> ## Documentation Index
> Fetch the complete documentation index at: https://prestiai.mintlify.site/llms.txt
> Use this file to discover all available pages before exploring further.
# Quick Start Guide
> From product photo to lifestyle scene in minutes
## Transform Your First Product
Ready to create stunning lifestyle visuals? This step-by-step guide will have you generating professional scenes in under 5 minutes. No design skills required.
Create your free account at [app.presti.ai](https://app.presti.ai). You'll receive 3 free credits to explore all features.
Upload a photo of your product - anything from a smartphone picture to a professional packshot works. The better the quality, the better your results.
We'll automatically remove the background if needed, keeping only your product to then create the perfect ambiance around it.
Add accessories around your product to enhance your composition. These will become part of your packshot once you click "Save changes."
**How to add accessories:**
* Use the brush tool to define where you want the accessory - the brush size tells the AI how big to make the item
* Make the brushing slightly larger than the desired item size
* Be specific in your descriptions for better results:
* Instead of: "Brown dog"
* Try: "Sleeping brown Welsh Corgi wrapped in a blue wool blanket"
Build up accessories gradually - add one, save your image, then add another. This gives you more control over the final composition.
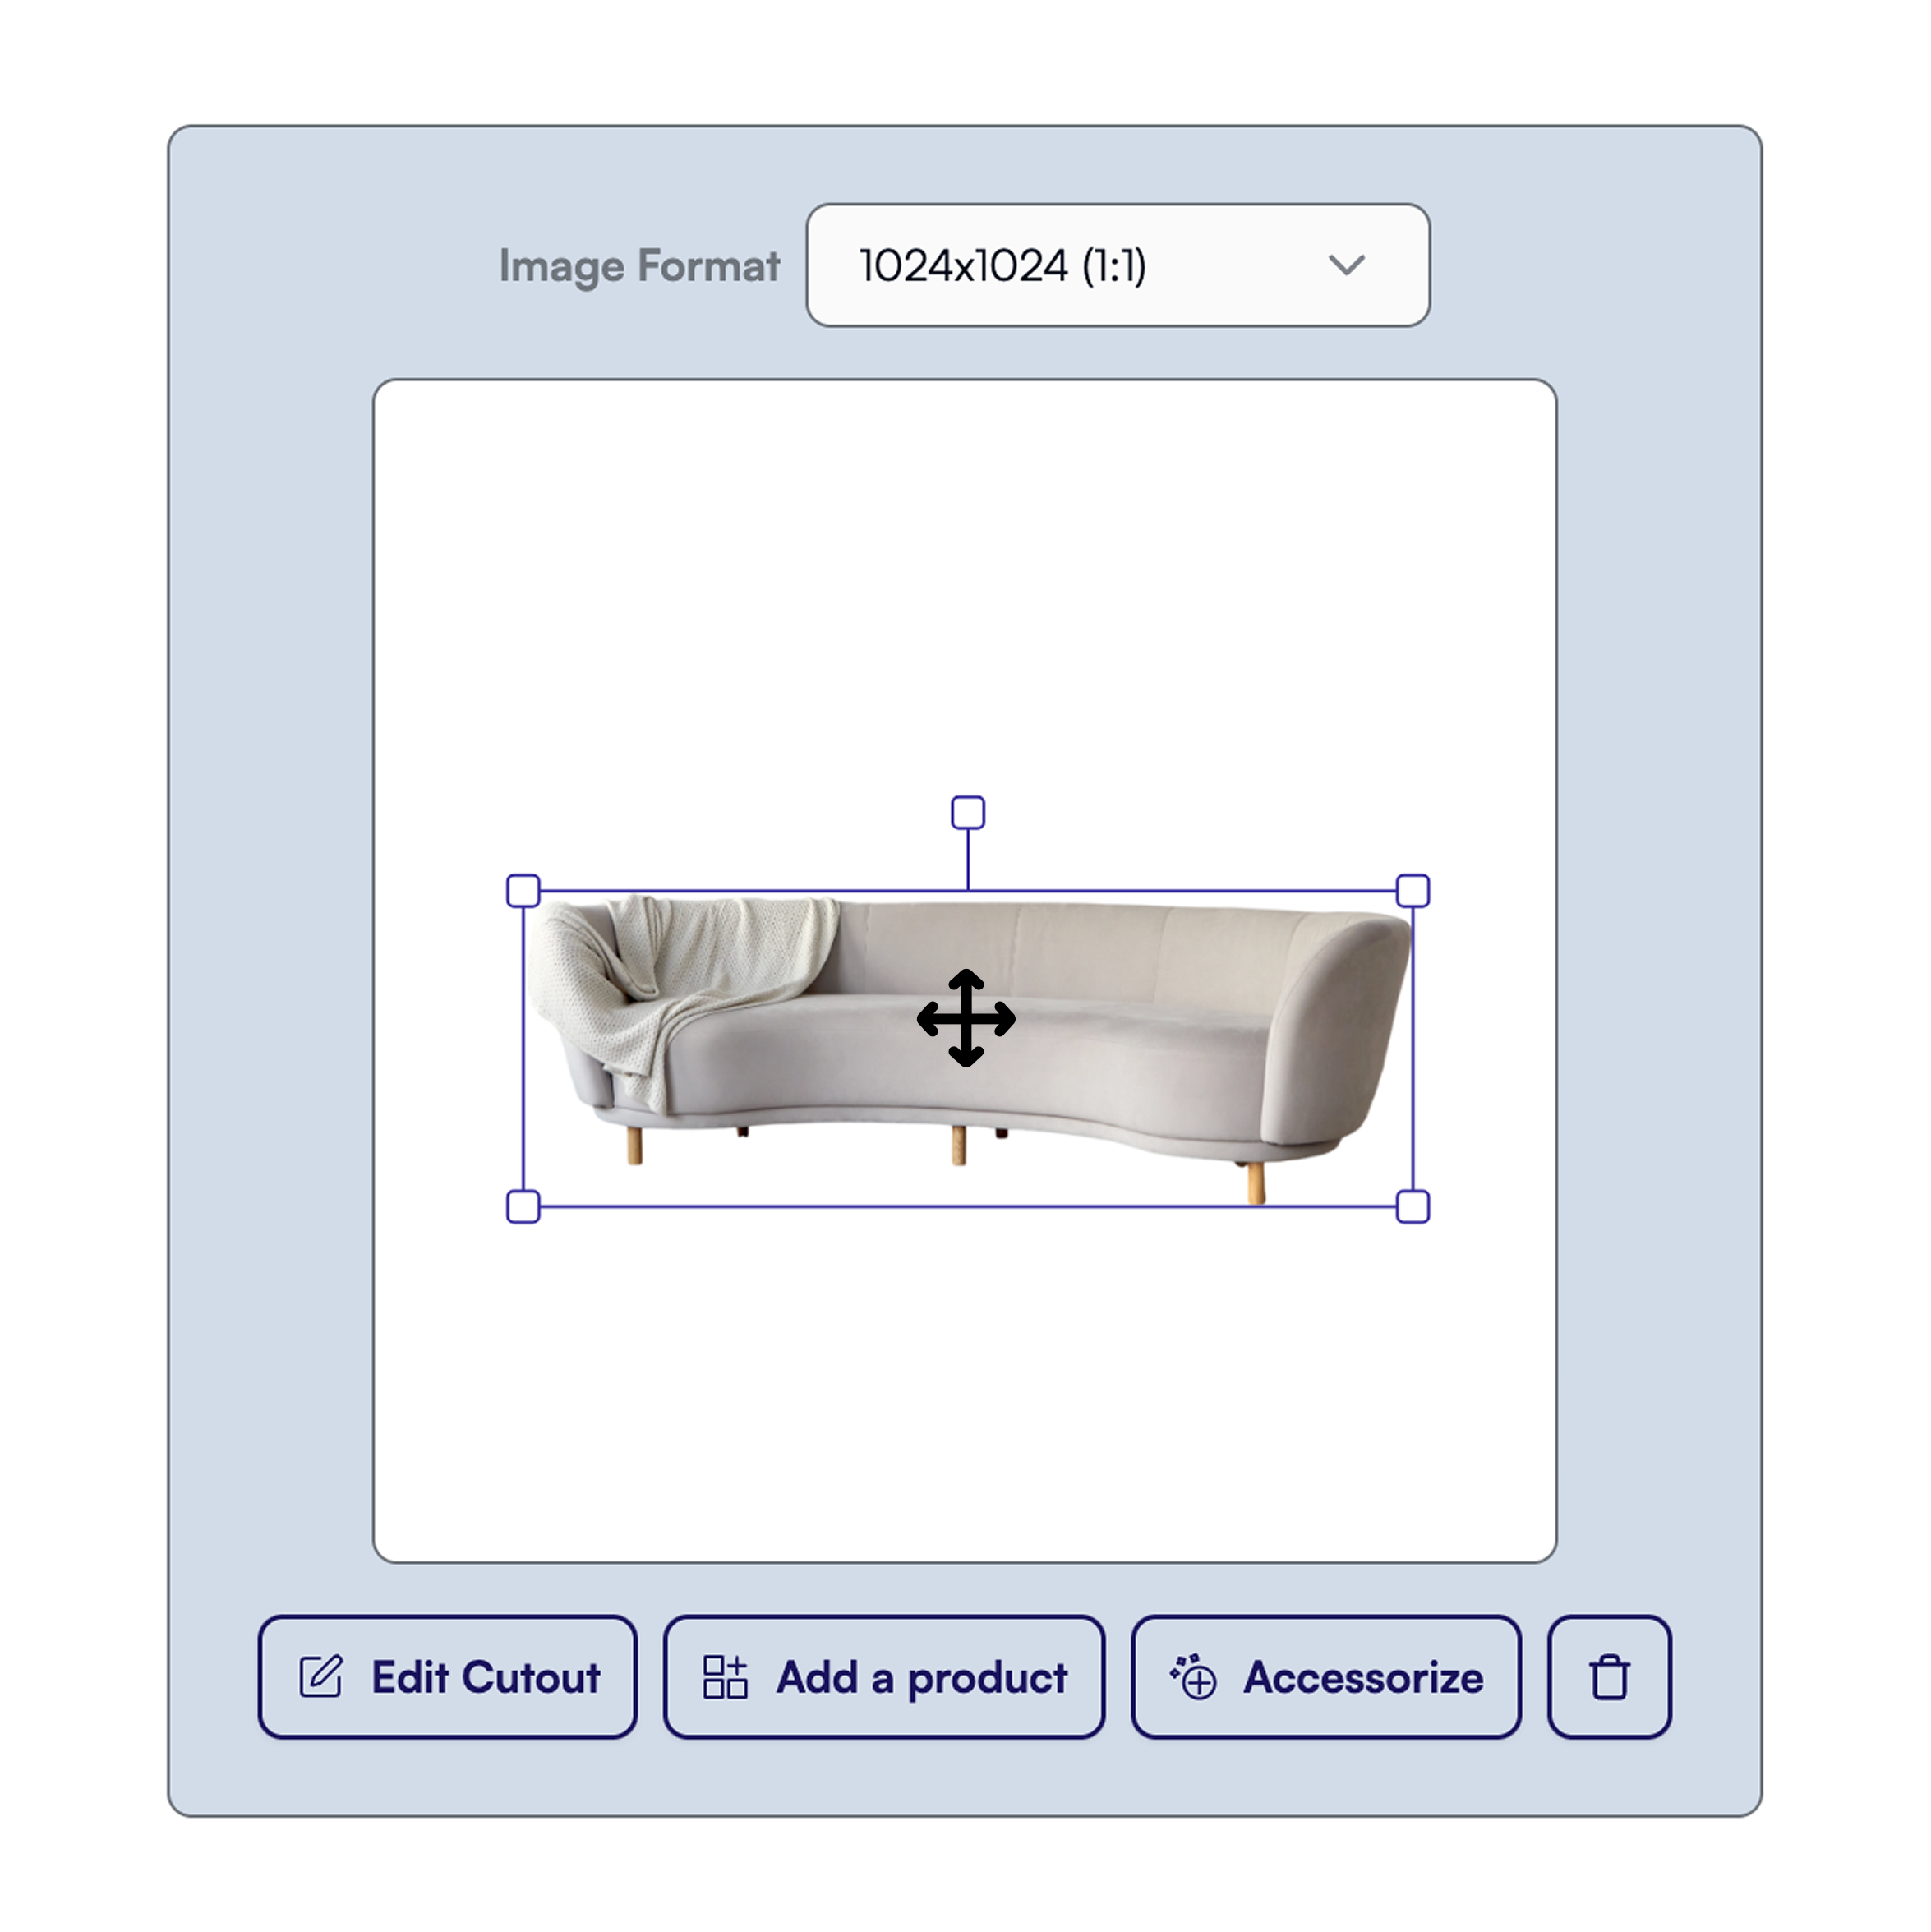
Position and scale your product on the canvas. This placement tells the AI where the floor is and determines your final composition.
**Key positioning tips:**
* Place your product to show the AI where the "floor" level should be
* Scale appropriately, leaving room around your product for the scene
* This position becomes permanent once you generate the background
If your product fills the entire canvas, you won't be able to zoom out later to add room accessories. Always leave space around your product.
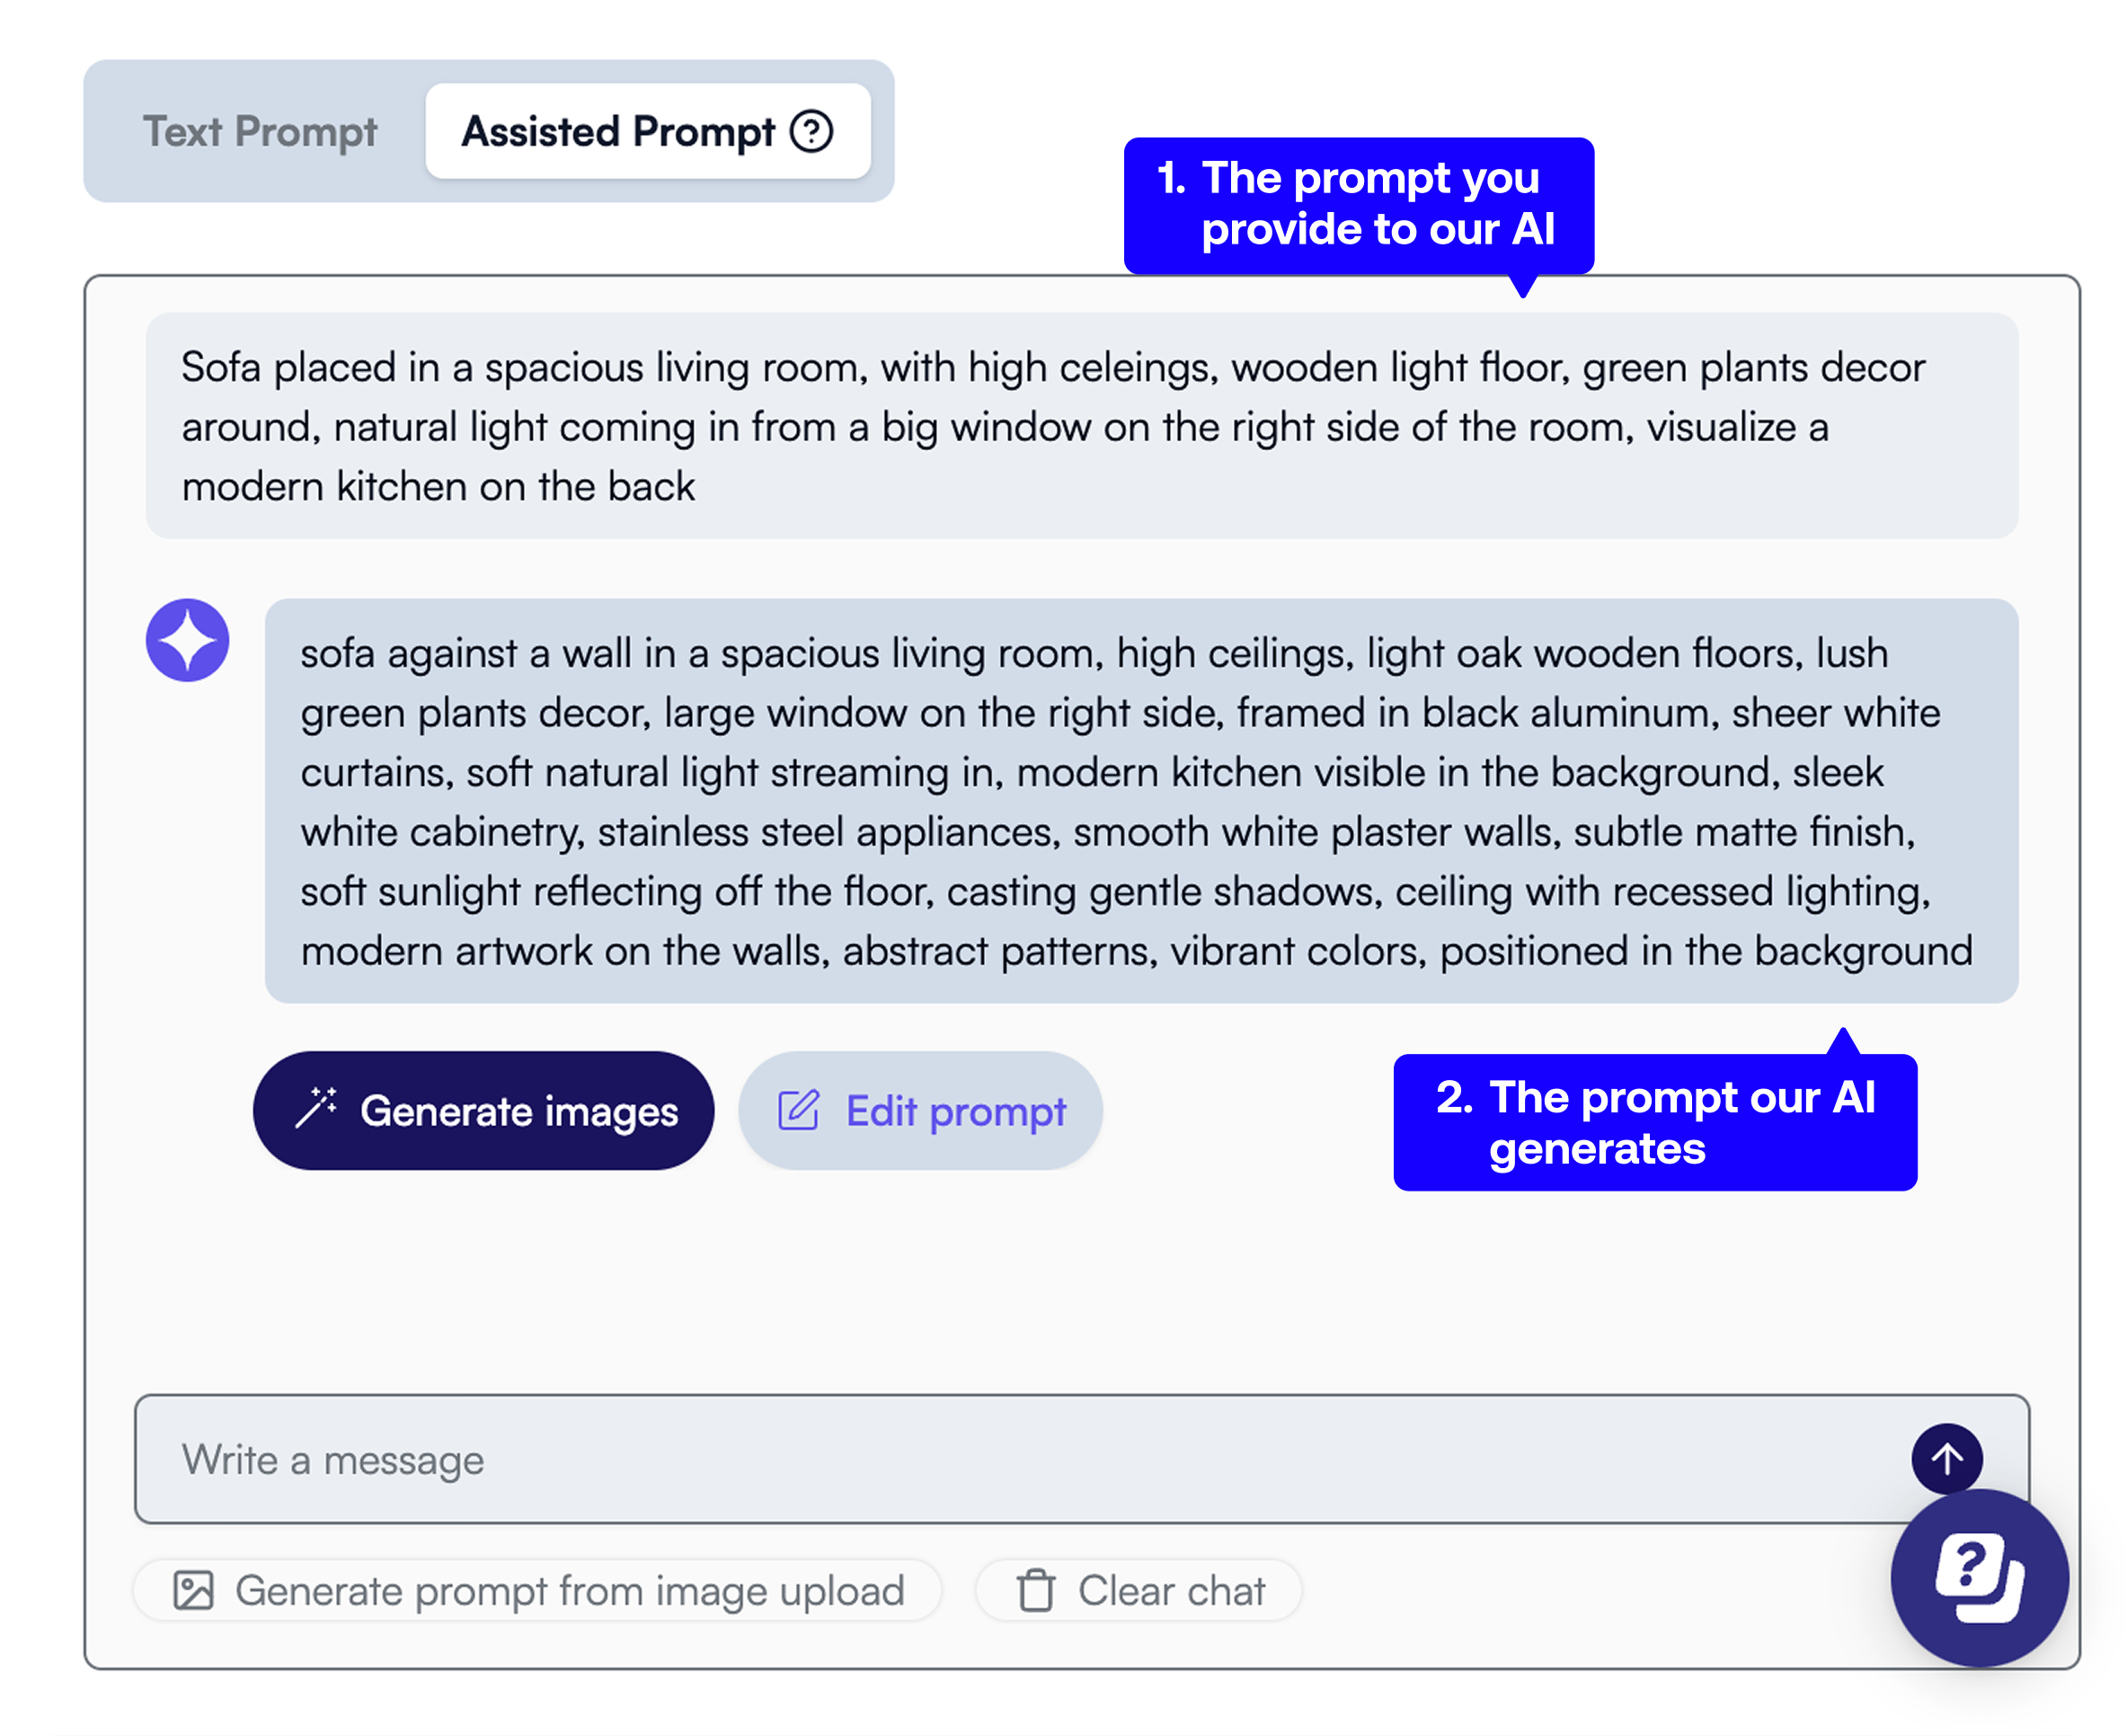
Describe where you want your product placed in the room. Be explicit for better results - for example: "sofa against a wall in a spacious living room".
**Don't worry about details** - our Assisted Prompt tool automatically expands even basic prompts into 30+ detailed keywords, optimizing your results. Just describe the general vibe you want.
Click "Generate images" to create your scene. You'll receive 4 different options to choose from.
**Refine until perfect:**
* Generate as many times as you want - no limits
* Adjust your prompt to fine-tune results
* Pick your favorite and use editing tools to perfect it
* No credits used until you download
Once satisfied, choose your resolution and download. Credits are only deducted at download:
* 1K (1 credit)
* 2K (2 credits)
* 4K (3 credits)
* 8K (4 credits)
## Video Tutorial
## Next Steps
Learn about all available tools and features
Master the art of prompt writing
Weekly sessions with our experts
## Common First-Time User Tips
Begin with basic prompts like "minimalist living room" before adding complexity.
Let the AI help expand your ideas - it knows what works best for furniture scenes.
Generations are unlimited - only downloads cost credits. Try different styles!
Use the album feature to organize successful scenes for future reference.
**Congratulations!** You're ready to start creating professional product visuals with Presti.ai.
 **Key positioning tips:**
* Place your product to show the AI where the "floor" level should be
* Scale appropriately, leaving room around your product for the scene
* This position becomes permanent once you generate the background
**Key positioning tips:**
* Place your product to show the AI where the "floor" level should be
* Scale appropriately, leaving room around your product for the scene
* This position becomes permanent once you generate the background
 **Don't worry about details** - our Assisted Prompt tool automatically expands even basic prompts into 30+ detailed keywords, optimizing your results. Just describe the general vibe you want.